 |
| Photo by Flitterin |
For Valentine's this year, I wanted to do a little something for my daughter's teachers at her preschool, and decided to do a small flower arrangement. I am not a florist by any means, but really enjoy putting together an arrangement and have taken a couple of classes for fun at an amazing florist here in Los Angeles:
Floral Art. I found these pink teacups on sale at
Joann Fabric and voila! The teachers got teacup flower arrangements.
 |
| Photo by Flitterin |
My technique is not by any means professional, but does produce an impressive arrangement to give as a gift, or decorate a table for a party. These would be lovely at each place setting at a tea, shower, or garden party.
To get my flowers, a took a trip to the amazing
LA Flower Mart in downtown Los Angeles. This is one of my favorite places to go to in Los Angeles. There is a stunning array of blossoms any time of the year and half the price of a florist and much less than even your local grocery store. I plan to do a more thorough post with all the details soon...
 |
| Photo by Flitterin |
With roses, you get the most bang for your buck, but I'm not a huge rose fan and usually gravitated towards more delicate garden flowers. One of the first vendors I went to had a beautiful selection and being short on time, I snapped up two bunches of white with a hint of pink anemones, pink ranunculus, and star of bethleham. I also bought some dusty miller, which is a fuzzy silvery green leaf for texture, but decided against using it. With all of the flowers bought I was able to make four arrangements, which came to about $10 an arrangement.
 |
| Photo by Flitterin |
So here is what you need:
1 Teacup (any size or shape will work)
Block of Wet Floral Foam
Pencil
Knife
Garden Shears ( easier but a sharp knife will do.)
Flowers I used:
4 Anemones (mix of open and closed)
4 Ranunculas (mix of open and closed)
2 Stems of Star of Bethlehem
Aqua tubes (optional)
Any mix of flowers would work for this. When I do arrangements I usually try to have three different textures, a big flower like a peony, or rose, a smaller flower or more closed flower, like tulips, callas lily, hydrangea, star of Bethlehem (here), lily of the valley, tuber rose, and a leaf or greenery of some kind which I omitted here. These would be great with all one flower too, and I think hot pink roses especially if retroflexed could be more fun and modern.
To start, soak your floral foam in a sink or bucket of water for a two to three minutes. When saturated, remove from the water and place your teacup upside down on top of the foam.
 |
| Photo by Flitterin |
Press down lightly to make an impression,
 |
| Photo bt Flitterin |
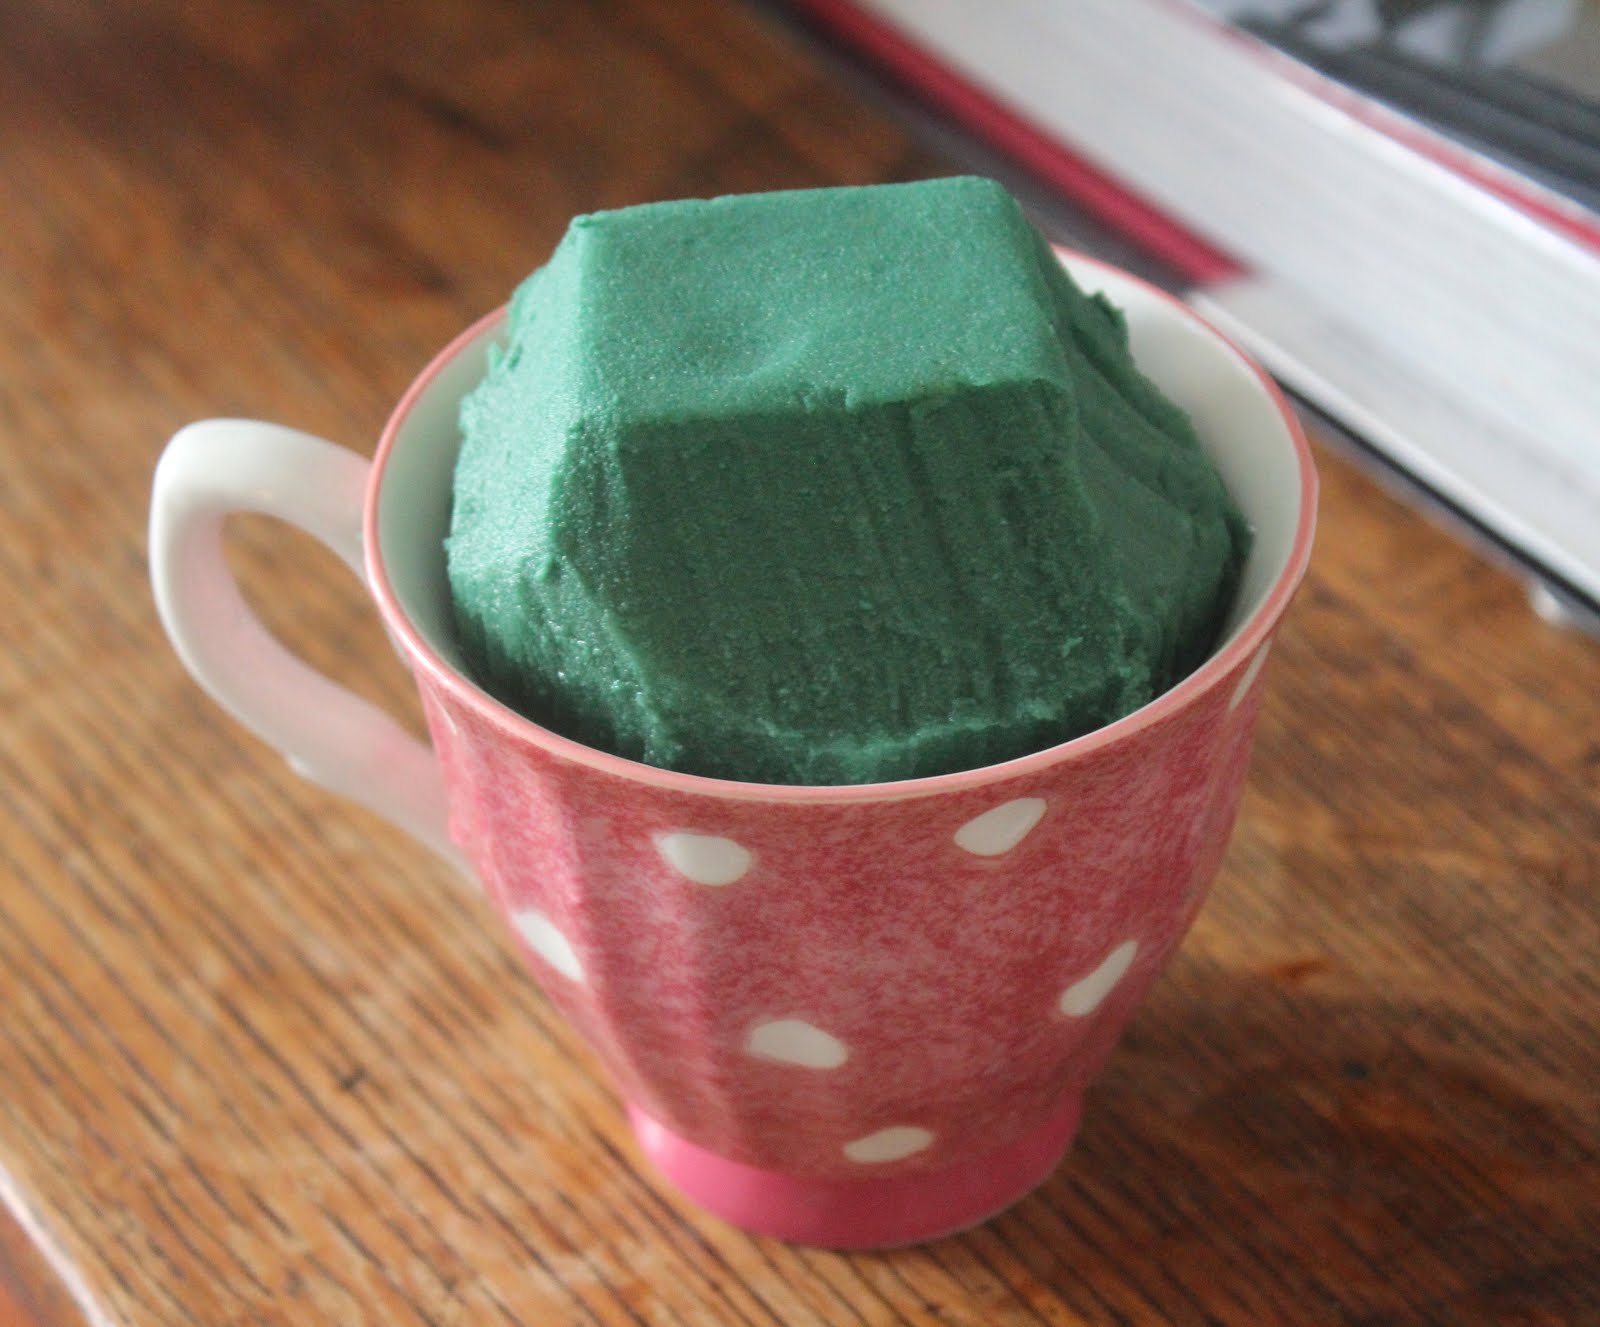
Then, using your knife follow the outline to cut out a cylinder. You will need to trim the cylinder down until it fits snuggly in the cup. You want the foam to stick up about an inch or two above the container, but more then that you will want to trim down. I then cut the sides at 45 degree angle to make decorating easier and filled the cup with water.
 |
| Photo bt Flitterin |
Next, trim your flowers at a sharp angle to about two and a half inches removing leaves unless close to the head of the flower.
 |
| Photo by Flitterin |
Start with your smallest flower here the star of bethlehem, and push the stems firmly but delicately, into the foam on either side of the arrangement. With floral foam flowers with thick stems work best, but if you are using a delicate stem, or if your flower breaks off too short while you are trying to press it into the foam, you an put them into water filled aqua tubes, and then press those into the foam.
 |
| Photo by Flitterin |
Then take two of your your biggest or most open flowers, here the anemone, and press them into the top of the floral foam.
 |
| Photo by Flitterin |
I then began filling in with flowers using clusters of similar color until the arrangement looked full and no floral foam was exposed.
 |
| Photo by Flitterin |
 |
| Photo by Flitterin |
Since these were small, I kept them overnight in the fridge and the next day the looked equally fresh. You can always add more water to the foam or mist the blossoms with flowers to keep fresh. I have found no matter what my floral foam arrangements just don't last as long. If anyone has any tricks or advice, let me know!
 |
| Photo by Flitterin |


No comments:
Post a Comment